Pages

Wednesday, 5 March 2014

Scrapbooking using a Sticker Sheet

Alison has done this page using only a sticker sheet for your inspiration as well as the card below.


 The sticker sheet above is the one she used and then there is a matching alphabet one below that you could incorporate.

Wednesday, 8 January 2014

Land Ahoy!

Here is the first card Belinda has made for you this year.
She used the Tim Holtz embossing folder as a background which she inked with walnut stain, peeled paint and chipped saphire Distress inks.  Stamped (with archival ink) the Prima set of the ship, compas and anchor onto white cardstock, cut it out and inked it.
 
She did the same with the "Explore" bingo stamp from the set by Kaisercraft.  The ships sails were first covered with Glossy accents and left to dry, before the background colours were added.  On the small stamped compass, Belinda added glossy accents after she had inked it to add dimention.  She then pop dotted all the cut out stamps onto the embossed background, glued the front onto a kraft card and added some bakers twine as a final toutch of colour together with the shiny anchor at the top of the card.

These stamps and embossing folders, etc are currently available in store.


Friday, 9 August 2013

Card sample for the store

Photo: Belinda's latest sample using all the new arrivals in store!


I am having such fun making samples for the store.  Here is my latest one using a whole lot of products on one card!
Medium_658952
Sizzix die

Medium_658244
Sizzix die: Bell Jar by Tim Holtz

Kaizercraft stamp

Cuttlebug embossing folder

View larger image
Martha Stewart punch.

Saturday, 13 July 2013

Vintage Telephone die Card

Belinda has been working on interesting ways to use your dies.

Here she has die cut two telephones.  Printed "lift receiver up!" on her PC and cut it out to stick inside the back of the card.  Then she stuck a pice of card stock inside the reciever on both ends to fill the holes and the front of the card where she has pop dotted the dial by putting a small piece of card stock behind where we used to write the number to fill the gap and placed the sticky foam dots there to raise it up.

Then she stuck the two telephones together just at the base of the phone and the two ends of the reciever.  Cut the receiver off the phone and glued a slim long piece of card stock into the handle which will fit inside the body of the phone when the card is closed.  She did not glue the sides of the body of thephone closed so it is easier to get the card in and out.

The speach buble is available in store and she used a personal stamp to write the happy birthday.

Card done!

Saturday, 6 July 2013

Latest samples


Sorry for the absence of updates on our blog, but we have been keeping you posted on our latest activities via Face Book, but we realise not everyone is on Face Book, so we are going to try to update here more frequently.

Belinda has been very busy making samples to inspire you on how to use our latest products that have just arrived...These 4 cards use Martha Stewart round the page punches, Tim Holtz color core paper and some Sizzix dies.  Quite a few have sold and we have re-ordered, so give us a week or so to update you on their arrival.

Alison will be on leave next week from returning on Monday 15th July, but Shanaaz will be in store to help you with your purchases.

UPCOMING CLASSES:
Belinda will be running a FREE demo from 10 till 12 on Saturday 13 July
Carolyn is teaching a card class on the 20th July
Nicki is teaching cards on the 27th July

email belinda@acorncrafts.co.za to book your spot.

Hope to see you in store and at classes soon!

Belinda and Alison

Monday, 8 April 2013

Using Distress Paints


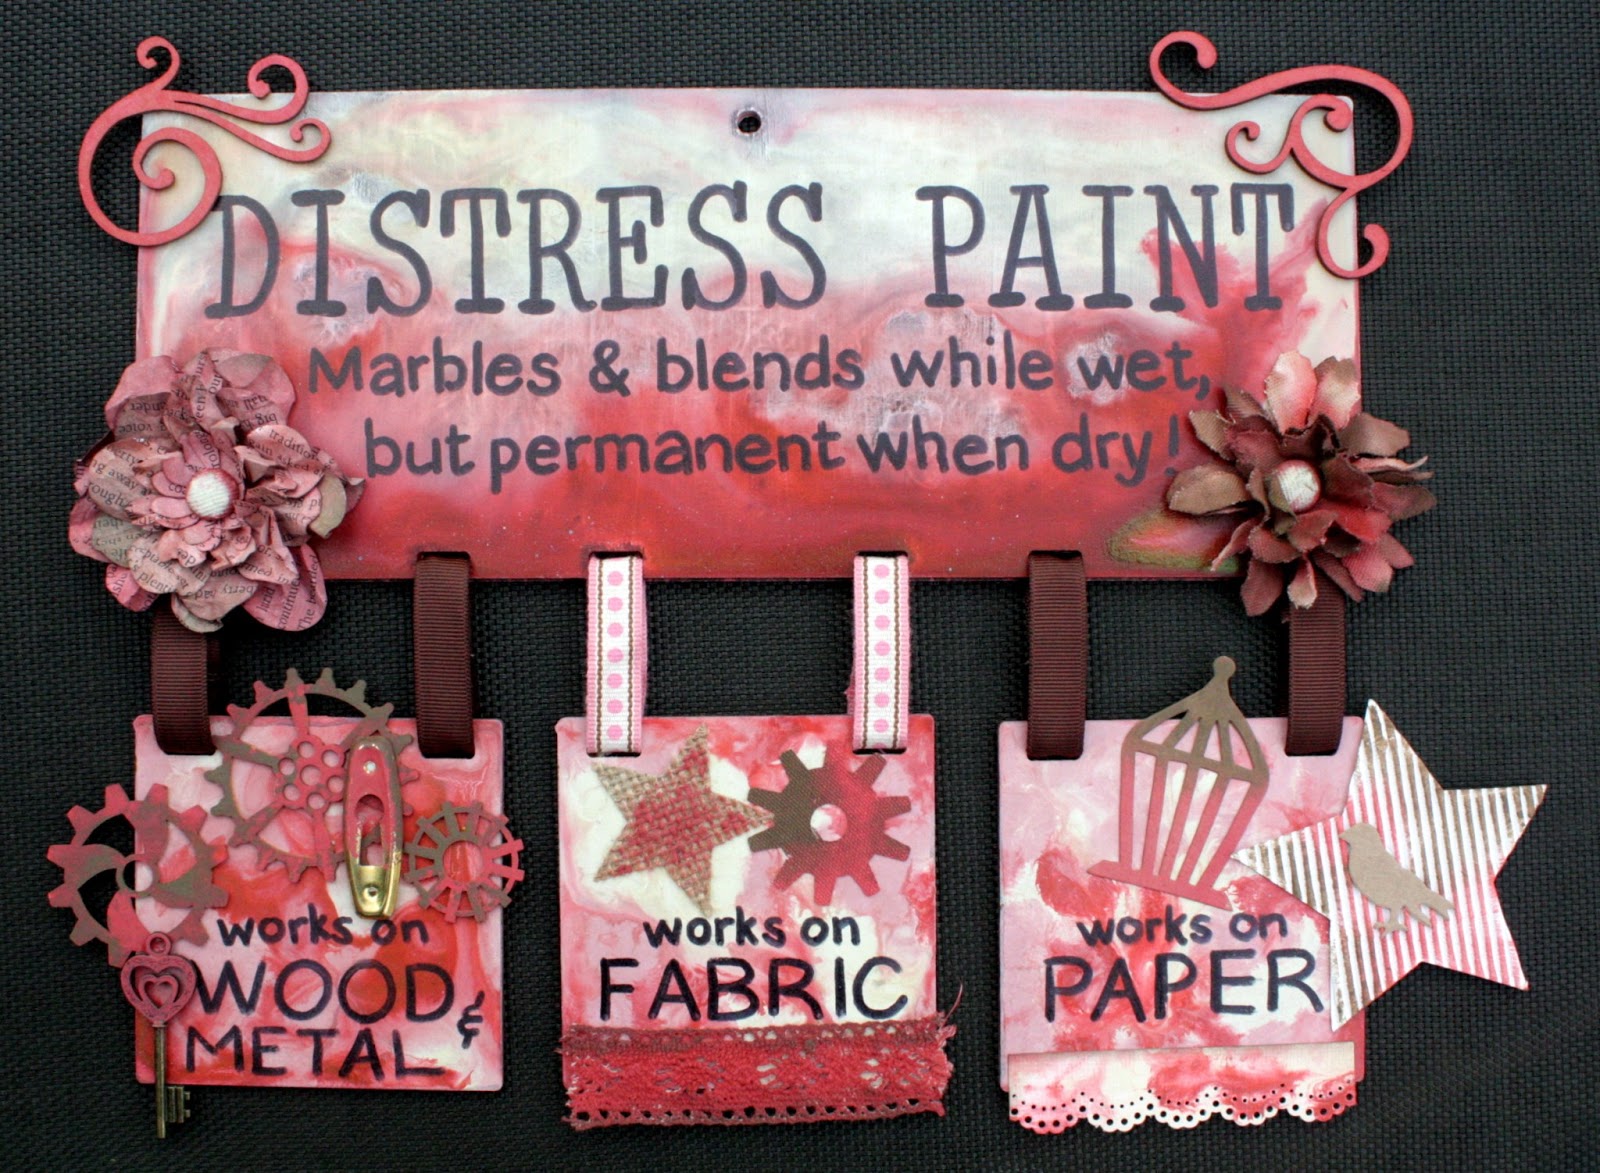
Belinda has been playing with this new invention by none other than Tim Holtz...He has managed to combine Distress inks and paint dabbers and come up with Distress Paint.

It is water soluble while wet, but permanent when dry.  This means you can blend and "wick" (marble) it while it is still wet and add water to make it wick more, but layer up other products on top of the dry paint and it won't budge and re-wet or come off.

It sticks to wood, paper, metal and fabric.  It stamps beautifully and is fully washable when dry.

Only half the key hole was covered in paint to show the shiny metal surface and the lazer cut cogs were covered completely
This was book paper covered in diluted Distress paint.

Fabric dipped into diluted Paint on the craft sheet.


Here is how Belinda created the hanging above:
Dab the paint onto the surface and spray lightly with water while it is still wet. (Do not drown it!)  You can pick up and tilt the item till you are happy with the marbling or move the paint with your fingers or a brush.  It is best to dry the paint at this stage with a heat tool or it can over blend.

This is the paint while it is wet.  

This is the paint when it was dry.


Wednesday, 27 March 2013

Gorjuss tutorial

Hi there

We have just received our stock of these stamps and Belinda has wasted no time in playing with them!

Here is a tutorial to inspire you on how to use the new Gorjuss stamps.

First stamp out your images onto plain white card stock using black Archival ink so it does not smudge later.  For the one dress you can stamp the image onto patterned paper and cut it out as shown above.

Using any medium of your choice, you can colour outside the lines as you are going to cut the images out.  This helps in two ways, one, you don't have to be too meticulous in your colouring and this saves time, two, if you are not great at cutting fine detail, at least there will not be any white showing!

Once you have coloured and cut them out,put them on pop dots and place them on your background.  Here they are all in the same stamped frame, just coloured with different inks to match their paper.

The armchair is from a set of die cuts on our sale stand and the 

You can use any medium to colour in with, there is no right or wrong, just have fun and be creative in your combinations.

Belinda and Alison